

Our house is a 1930s built semi-detached on Langley Road, Chippenham. It has three bedrooms and a bathroom upstairs, all original 1930s size and layout. The smallest corner bedroom is not much bigger than a cupboard, consequently the only sensible bed layout was a bunk bed arrangement with a desk underneath. Whilst this makes great use of space, it does mean my son sleeps about 2ft from the ceiling, not ideal for a now six foot plus teenager!
The eaves of the 1930s roof were designed such that they cut off the corner of the house. Whilst this was no doubt material saving at the time, it meant that corner of the roof had very little insulation above it due to the difficult shape. The room also has a wooden loft hatch. This corner of the house is the most exposed to weather, and so the ceiling and walls in this corner were frequently very cold, attracting condensation, and growing black mould. How could we fix it?
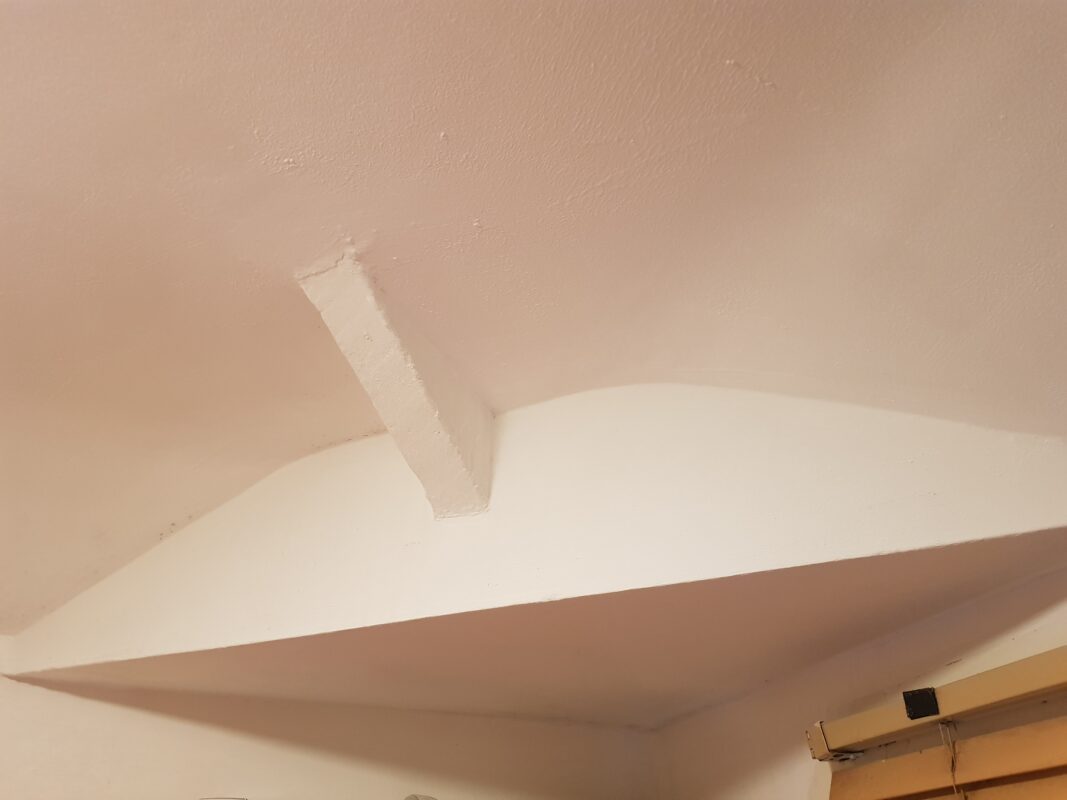
The low eaves of the roof meant this corner of the house and bedroom was always cold, as were the sloping ceiling walls. The wooden roof beam even passes through the corner with the roof felt and tiles just above it.
The corner was often dripping with condensation leading me to think the roof was leaking. Black mould would grow and spread rapidly along the low cold ceiling.
What causes condensation and Mould?
When moist air reaches cool surfaces – such as walls, ceilings, windows and pipes – it turns back into water (condenses) making those surfaces damp.
We produce a lot of moisture through our everyday activities at home, such as showering, cooking, drying laundry and even just breathing.
Condensation occurs due to one or more of the following:
- Inadequate ventilation and a build up of excessive moisture.
- Missing or incomplete insulation resulting in cold spots.
- Inadequate heating resulting in lower surface temperatures.
Preventing condensation
Two immediate solutions to condensation are …
- Produce as little moist air as possible — for example, by drying clothes outside and keeping lids on pans.
- Make sure any moist air you create can leave your home through vents, extractor fans and open windows.
More information on Damp and Mould can be found on the Centre for Sustainable Energy site here.
Improving Insulation
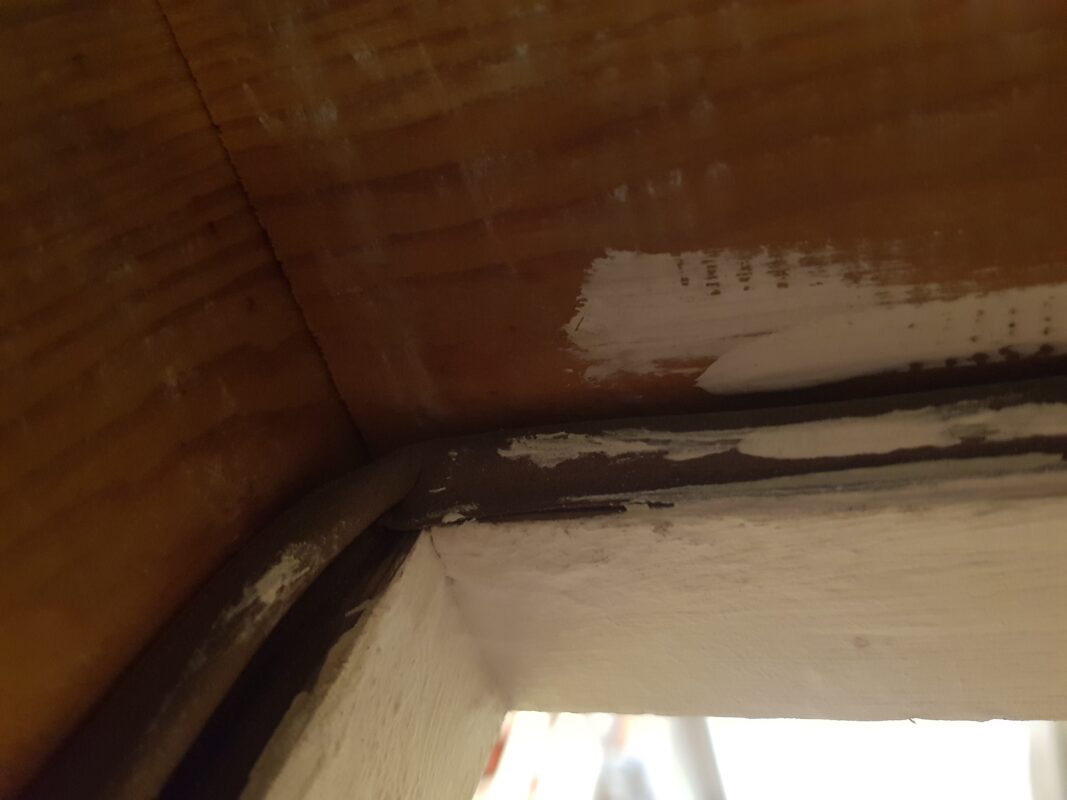
The first and simplest thing I did was to improve the loft hatch draught proofing. A trip to B&Q and I had purchased a stick on roll of squishy rubber insulating seal. I fitted this seal around the loft hatch in my son’s bedroom such that the hatch sat on the seal and prevented draughts from the loft or hot air rising and passing through the leaky loft hatch. This was a very low cost easy diy fix.
Fitting a seal around the loft hatch was an easy diy job. There was plenty left so I also sealed the front door surround. Costs under ten pounds from B&Q and has a self adhesive backing, easily cut to size with scissors.
The next insulation job was slightly trickier – how to insulate the very low ceiling and eaves?
It so happened that our local Aldi had a middle of the isle sale and were selling a low cost multi foil insulation called YBS multi quilt. This had nine layers of foil and insulation in a sandwich. It was much thinner than standard rock wool insulation and claimed to be very insulative. I purchased a couple of rolls and was able to fit it in to the space closer to the corners. There is however a very special point to note. 1930s cold roof designed loft spaces like this need to be ventilated by air flow from the eaves to keep timbers dry. The black bitumen felt under the roof tiles is good at keeping driving rain out, but doesn’t let moisture in the loft escape. Hence airflow through the eaves allows moisture to escape and prevent rot and mould in the loft. So it is important not to completely block air flow. There are many good guides on loft insulation, here is one such guide
With a bit more research I also realised that I was in for a penny in for a pound, as to be effective I really needed to insulate the whole loft with multi foil. Hence what started as a middle of the isle purchase of two rolls at £44 each, ending up costing around £300 as I ordered enough rolls and joint sealing tape to do the whole loft. With hindsight I might not have done this and may have lifted the loft boards to add more standard insulation to a height of 300mm. I ended up also adding more rolls of standard rock wool insulation to the unboarded areas of the loft and above the loft hatch to increase the thickness of standard insulation.
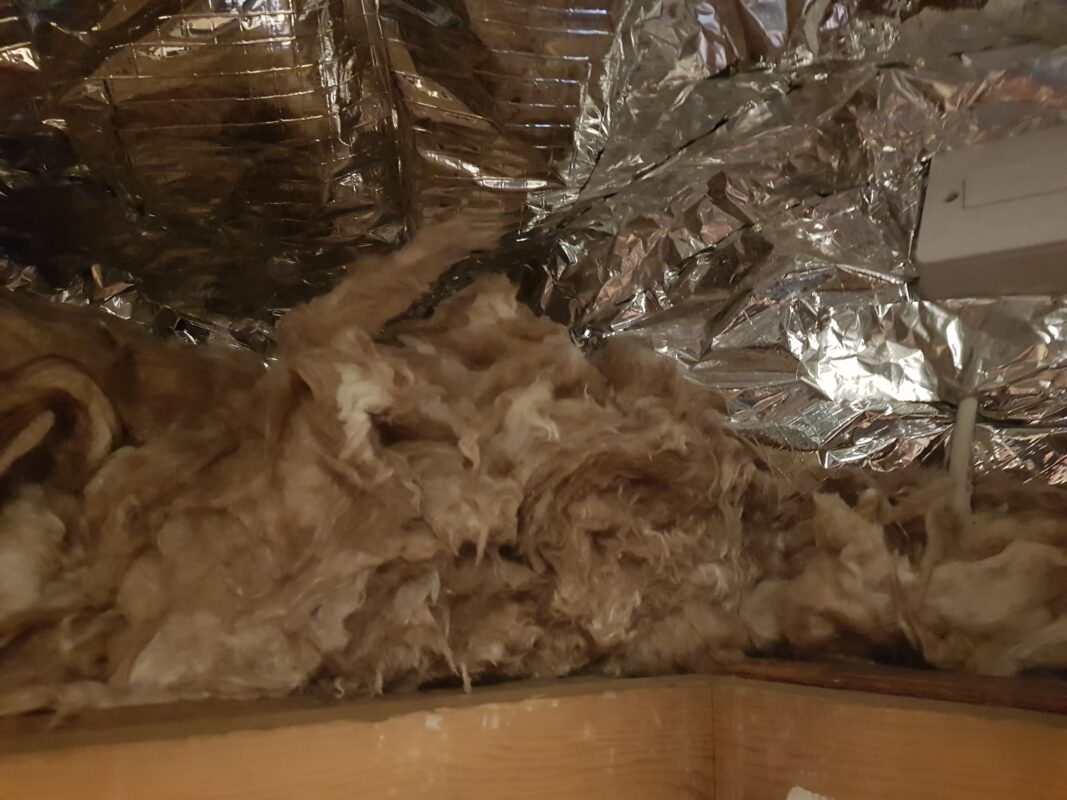
My slightly non standard approach involved raising the height of traditional insulation to 300mm and adding multi foil insulation. This isn’t a typical approach and would normally only be done if creating a loft room by adding plasterboard. It is important to keep ventilation at the eaves in this type of loft with black bitumen felt under the tiles. I will be checking from time to time. I also added loft insulation above the loft hatch.
There are several grants for loft insulation available.
Ventilation
Undoubtedly the added insulation did make the room feel warmer. It actually made the whole house feel warmer, so that was good. However it didn’t stop the cold spots, condensation and mould completely, mainly due to the low eaves and difficulty of insulating them.
There was an original 1930s cast iron vent in the corner of the bedroom. However it had a sliding cover, and as it was so cold my son would usually slide it shut in the winter stopping all ventilation.
So, how to ventilate and not lose all of the heat in the room?
The answer I happened upon was a Single Room Mechanical Ventilation and Heat Recovery (MVHR) unit.
What is Mechanical Ventilation and Heat Recovery (MVHR)?
Ventilation and heat recovery is nothing new in large office buildings and industrial spaces. However in UK domestic housing it has only really been used until now in so called Passivhaus designs. Passivhaus designs are extremely energy efficient. Not only are they highly insulated house design with almost no cold bridging, they are also extremely airtight with all joints being taped. Consequently they are highly energy efficient with very little heat loss through conduction or convection. To maintain air quality they use whole house ventilation and heat recovery systems. Warm humid air is extracted from bathrooms and kitchens and passed through a heat exchanger before venting to the outside. The heat exchanger recovers some of the heat in the extracted warm air, typically as high as 90% recovery. At the same time external cold air is drawn in and passed over the heat exchanger, warming the air, before distributing to living spaces. Passivhaus designs are so air tight that air is usually extracted from warm rooms such as the bathroom and kitchen, and passed in to living rooms and bedrooms. The air flow is carefully designed and balanced.
So is it worth trying to implement MVHR in a leaky 1930s house?
Well some schools of thought say no, it’s simply not worth it. The house will be too leaky. If it is done in retrofits, then it is usual to have extract and supply vents in the same room.
So what’s a single room MVHR?
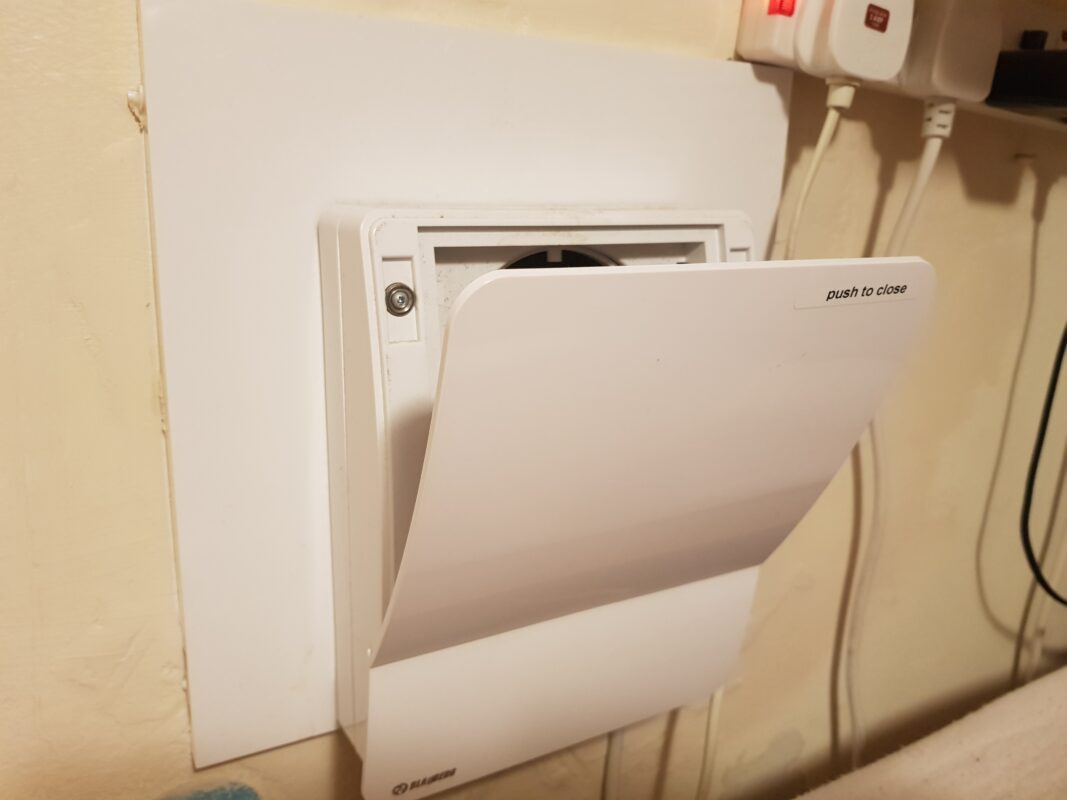
A single room MVHR looks like a long extractor fan.
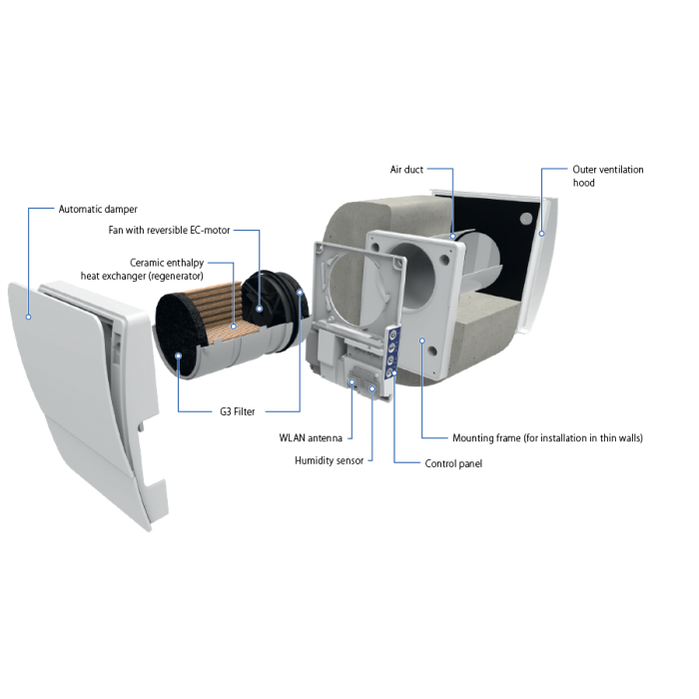
Here I’ve borrowed the manufacturer’s image of the Blauberg mini single room MVHR which i fitted. It fits in the same space as a normal extractor fan. In my case I knocked out the cast iron grill and fitted it through the rectangular hole left in the wall, filling the gaps around it with expanding foam to ensure the gap was insulated. Though you would normally hard wire the fan in, as I had an extension lead fitted next to the fan I plugged it in to this.
The fan extracts air from the bedroom for 90 seconds, warming a ceramic honeycombed heat exchanger. It then reverses drawing in outside air for 90 seconds, warming the air through the heat exchanger.
The fan had three speeds of operation and in the lowest speed trickle mode could hardly be heard running. It could also connect via wifi and an app. At the time of purchase during lock-down the fan was around £200. However with inflation it is now over £300. There are however cheaper non wifi models available from other companies that essentially perform the same function.
Anti Condensation Paint
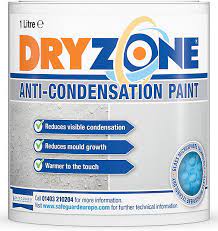
At the same time as fitting the fan I decided to repaint the ceiling. I had previously used anti-mould paints in our bathroom, but hadn’t had great success. Typically the paint would be fine until until a small crack appeared. Once water got behind it the whole ceiling would eventually peel and fall off. So in my research I tried a different ‘anti-condensation’ paint. I settled on a can of Dryzone anti condensation paint. This contains small glass spheres and claimed to add an insulative layer . Though I was a little sceptical the reviews were good and seemed genuine, so I gave it a go.
The paint can was quite small, and applying it was a bit like applying toothpaste. So at £25 for a 1 litre can it was quite expensive for coverage. I ended up painting the very cold parts that attracted mould and condensation.
Much to my surprise it did feel warm to the touch when dry! I have since also used this in our bathroom (a separate case study), and it has been brilliant in combination with the other measures described.
Did it work?
Well the short answer is yes!
So the combination of improved roof insulation to remove cold spots as best I could, sealing and insulating the loft hatch, using anti-condensation paint, and fitting a single room MVHR, has stopped condensation forming on the ceiling and made the room slightly warmer with better air quality. The black mould hasn’t taken over the ceiling as before.
However it’s not perfect.
The Blauberg mini MVHR has a closable magnetic cover, so at night my son often pushes the duvet up against it and it closes. He then forgets to open it in the morning. So I tend to have to check it and open it each day to maintain ventilation.
As the tall desk – bed blocks half of the window and there are blinds in the window, we still get window condensation and black mould forms over time. This is really due to lack of ventilation there, which is difficult to achieve with the current bed arrangement. One possible solution would be window trickle vents, but i’m happy to put up with wiping the windows once a month for now.
Tiny spots of mould do form in the corner joints, though this is over months rather than weeks and I’ve cleaned it off a couple of times.
The biggest win I would say is the air quality in the room, which is so much better than it used to be, and the slightly warmer temperature. The MVHR also filters the external air removing particulates. I say the room is slightly warmer as it is still the coldest room in the house, partly i believe due to an undersized radiator.
What does it cost to run?
One of the arguments against MVHRs in leaky houses is the running cost outweighs the heat recovered.
In trickle mode the fan draws 30W of power.
So 30W x 24 hours = 720Watt hours per day = 0.72 kWh at say 15p per kWh = 0.72 kWh per day x £0.15 = £0.108 per day x365 days = £39.42 per year.
Though I haven’t measured the heat recovered and worked out the cost of that, I think at £39 per year to run it’s worth it to have no mould on the ceiling and good air quality.
For me it’s actually cheaper than this to run as I have rooftop solar and battery, and i’m on the Intelligent Octopus Go 7.5p/kWh night rate.
Would you choose this Blauberg mini MVHR again?
The cost of this unit has increased since lockdown and is now over £300. There are cheaper units available from other European manufacturers. The unit is wifi enabled, but if you only have one unit there isn’t huge advantage to this. Blauberg’s unique point of sale on this unit is you could have one in one room, and one in another, and synchronise them over wifi such that as one is extracting the other is drawing in air, and vice versa. Thus creating air flow through the house,
However, I think with carpets on floors and leaky rooms, i’m not sure this would work so well. But it could be a good solution for downstairs ventilation in an open plan kitchen – living room.
I was however completely sold on the benefits of MVHRs for ventilation even in our leaky 1930s house, and went on to install a loft based unit for our bathroom and other two bedrooms. I’ll explain that in another post.
A single room MVHR is easy to DIY install if you’re able to drill a big enough hole in the wall, or it can be easily installed by anyone capable of installing a normal extractor fan.
A friend of mine did also install the same unit based on my experiences to try and solve a similar mould problem. One disadvantage he encountered which I hadn’t thought of was increased street noise. As we already had a 1930s cast iron grill the street noise was the same. However if you are drilling a new hole to a bedroom it might be worth considering the increased outside noise you may get through the fan.
In summer the fan can act purely as an intake fan, and similarly if needed it can run purely in extraction mode.
The filters need cleaning every few months and this is achieved by disconnecting and pulling out the central honeycomb heat exchanger and washing the filters in warm water.
I hope you have found this short case study useful.